Modding:Tiles
| This page is about modding. See the modding overview for an abstract on modding. |
Tile modding toolkit
This file contains the raw tiles imported into the game, which will help you figure out the right name and folder for each tile you would like to replace. You may only use these files to create modifications for Caves of Qud.
https://www.dropbox.com/s/g8coebnzoqfema9/CavesofQudTileModdingToolkit.zip?dl=0
Tile modification example
In order to add a new tile to Mehmet, first create a .png file in a Textures subdirectory of your mod. Additional subdirectories can be included.
%appdata%\Caves of Qud\Mods\[your mod name]\Textures\creatures\new_mehmet.png
Then update the ObjectBlueprints to replace Mehmet's tile with the path to your new tile. (as described in Object Modding)
Sample ObjectBlueprints.xml updating Mehmet's tile to creatures/new_mehmet.png
<?xml version="1.0" encoding="utf-8"?>
<objects>
    <object Name="Mehmet" Load="Merge">
        <part Name="Render" Tile="creatures/new_mehmet.png"></part>
    </object>
</objects>
Supported File Types
Only .png files are supported.
Tile Format
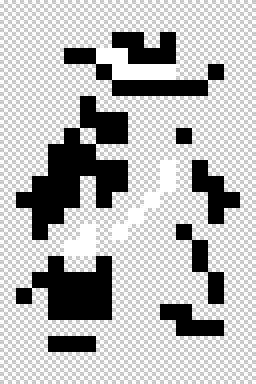
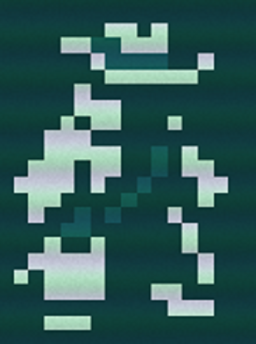
The default tiles and shaders used in Caves of Qud use 3-color tiles. Black, non-transparent pixels are painted with the foreground color, white non-transparent pixels are painted with the detail color and transparent pixels are painted with the background color.
| Example "3 color" Gunslinger Tile | Example Gunslinger Dynamically Colored In-Game |
These dynamic colors are dependent on the Render part in their ObjectBlueprints.xml:
<part Name="Render" Tile="items/sw_spray.bmp" DisplayName="&ySpray&r-&ya&r-&yBrain" ColorString="&G" TileColor="&G" DetailColor="r" RenderString="012" RenderLayer="5"></part>
Where TileColor represents the the white part of the unfiltered image, and DetailColor will recolor the black part. Transparent pixels will change to the background color of the game, known as viridian.
See Modding: Text Color Codes & Object Rendering for more details on the exact colors and how they are specified.
4th Color
Despite there being only three main colors for the tiles, there are a handful of tiles that use a 4th color, usually RGBA(124, 101, 44, 255). When rendered inside the game, a special formula is performed to create an weighted mix of the tile and detail color, with weight based on the 4th color's R channel (the first number). a 4th color that has 255 red would show up the same as the detail color.
True Color tiles
If you'd like your mod to supply true color tiles instead of the default 3-color tiles (white, black, transparent), then include a modconfig.json in your mod's root with the Following contents.
Truecolor tiles will be shaded as their natural color, with the background color blended in at 1-alpha.
Sample %appdata%\Caves of Qud\Mods[your mod name]\modconfig.json enabling truecolor shader mode
{
  "shadermode":"1"
}
Tile Size
Include a display.txt in your mod's base directory with the following entries to override the game tile height and width
sample display.txt
{
    "tiles":{
        "width":"24",
        "height":"24"
    }
}

